
The Magic Behind HexOS
Owning a home server is incredibly empowering and rewarding. It gives you control over your data and privacy. It reduces subscription costs and your dependency on the cloud. However, for those who aren't IT-savvy, existing products can be difficult to set up and maintain. That's why we created HexOS – to make owning a home server a breeze. With HexOS, you’ll enjoy a guided approach to configuration and simple management. And things like remote access, monitoring, syncing, and much more are made just as easy.
HexOS combines a simplified UI, automations, workflows, and managed services with user-provided hardware to offer elegant home server management for off-the-shelf server appliances, custom-built hardware, and even recycled PCs. Powered by TrueNAS, the world's most deployed enterprise-grade storage platform, HexOS provides a highly reliable and easy-to-use solution to store, use, and protect your data. In this article, we'll take a closer look at how HexOS works to make all of this possible.
Getting Started with HexOS
The first step on your journey to achieving some cloud independence is to obtain some hardware. Whether you repurpose an old PC or purchase a brand-new server appliance, you start by installing HexOS. The HexOS installer loads TrueNAS SCALE with a few additional components required for system discovery and connectivity management. During the install, users create an admin password, which will later be used to claim their server through the HexOS app.

Setting Up Your Server
At this point, users will open a browser from a device on their local network and log in at deck.hexos.com. Unclaimed servers on the same LAN will be detected and can be claimed by entering the server’s admin password. This will authorize and connect your system to the HexOS Command Deck, which organizes all actions requested through HexOS into jobs and queues them in priority.
A simple example of this is our setup wizard. While we let you do this and queue all that work behind the scenes, it's very important that when we provision the server, we first create the storage pools, then the folders, then the users, and then apply the permissions. And based on the use-case for the folder, different settings may be applied as well. In addition, we also start monitoring the system so we can notify you of issues if they arise. The HexOS Command Deck is responsible for all of this and more.

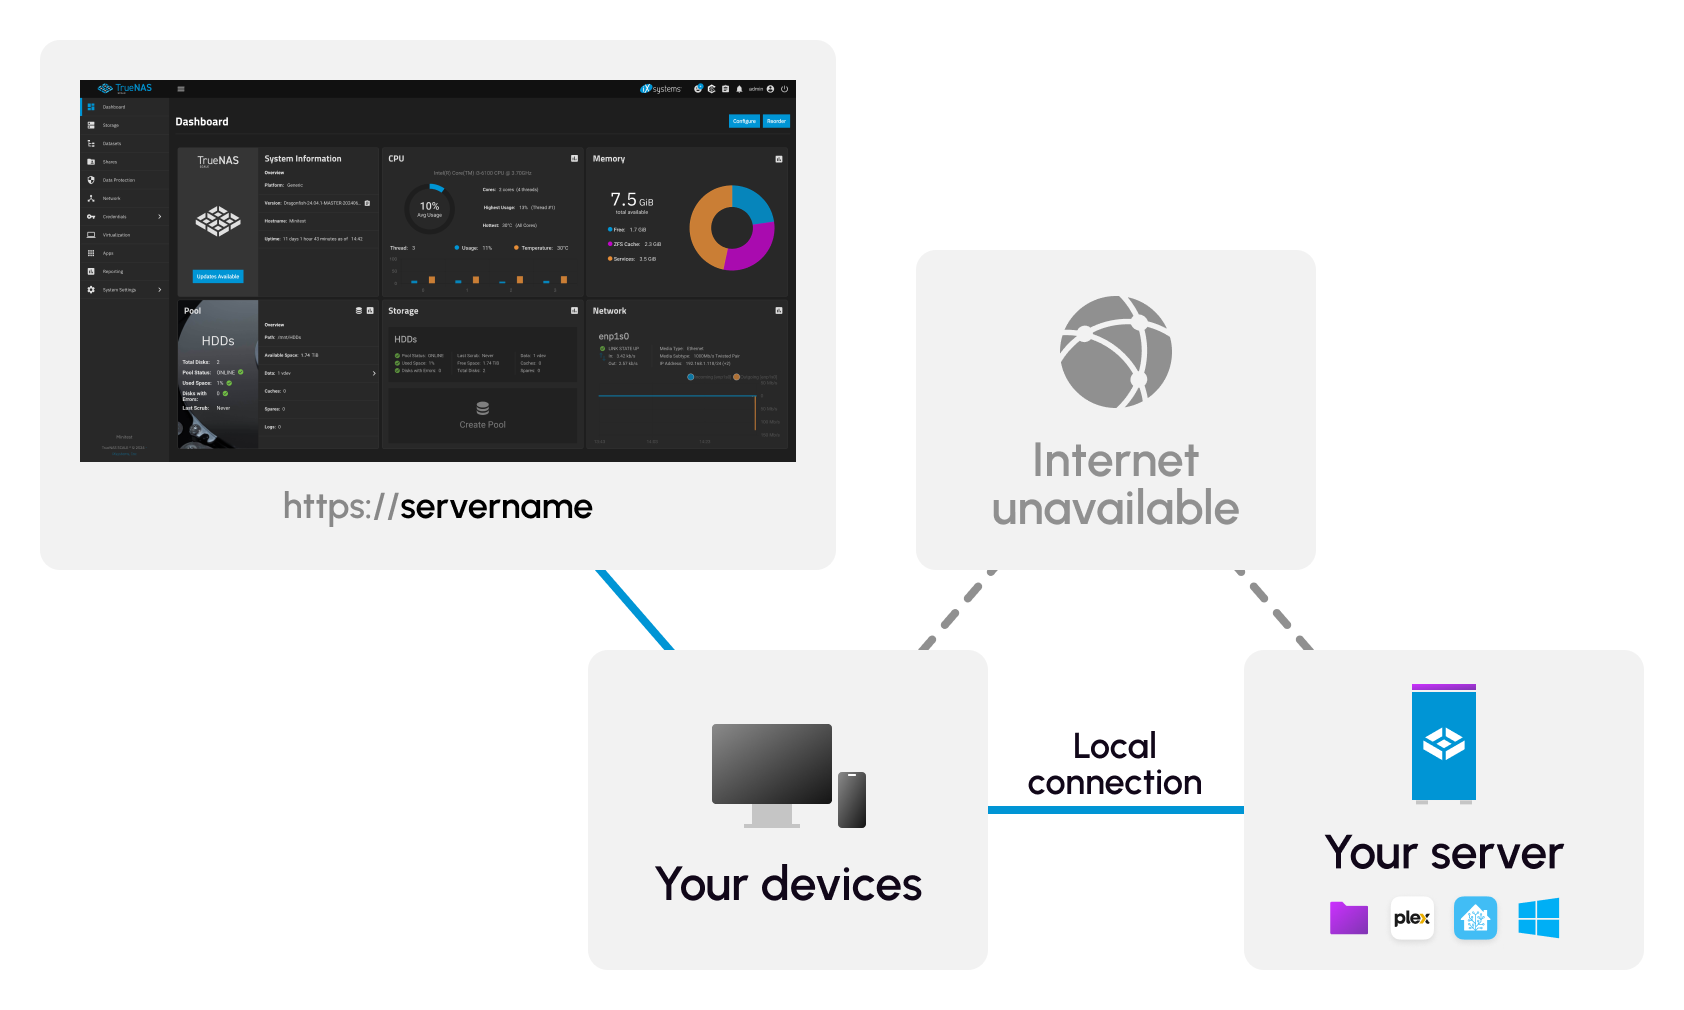
Reliability and Access
After setup, your home server will run, even in the rare case of a service disruption to the HexOS Command Deck. Your data, applications, and VMs will be accessible to devices over your local network, reliably protected by TrueNAS and ZFS. In an emergency, local admin access is always available through the TrueNAS UI and CLI. The user has the simplicity of HexOS with the power of enterprise-grade TrueNAS always available.
Features of HexOS
HexOS approach allows for many powerful features, including:
Anywhere management access. Manage from anywhere, using any device, over any network connection.
Monitoring and notifications. Email and SMS notifications built-in.
Live platform updates. New features just appear over time and with OS updates.
Automations, workflows, and orchestration. Simplified storage, apps, VMs, server-to-server sync, and more.